Kit for Leather Repair - Furniture Clinic
Watch this product and we will notify you once it is back in stock.
Kit for Leather Repair - Furniture Clinic
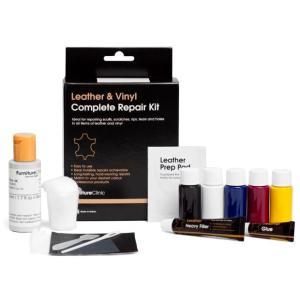
Our Leather Repair Kit contains everything you need to make a neat and durable repair of all types of minor damages in leather. These include tears, holes, cracks, scratches, cat scratches, and more. Such damages commonly occur on furniture, car upholstery, leather jackets, leather bags, etc. Most minor damages on leather can be repaired using this repair kit.
Contents:
- Leather Glue PU 50 ml
- Leather Binder 50 ml
- Leather Filler 25 ml
- Palette knife
- Reinforcement fabric approx. 20x20 cm
- Sandpaper 600
How to use the products:
The reinforcement fabric is used to seal holes and tears in leather. It is a thin canvas fabric that is very strong and is glued to the underside of the leather damage.
The palette knife is used to apply glue between the reinforcement fabric and the underside of the leather. It is also used to fill smaller holes and cracks with Heavy Filler leather putty.
Leather Binder is a binding agent used to strengthen worn leather, both on entire surfaces and at cracks and holes. It can also be used to fill minor scratches and cracks on the leather surface and to provide a base coat before coloring with leather dye.
Leather Glue PU is a highly flexible and strong leather adhesive used to glue reinforcement fabric under holes and tears in leather, as well as to glue cuts in leather. Because the leather adhesive remains soft even after drying, it works very well on items like sofa cushions and car seats where flexibility is crucial. It also works well for gluing leather to leather.
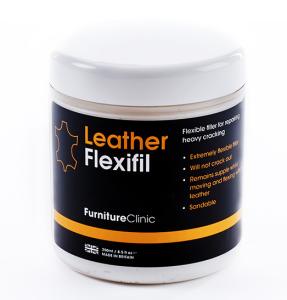
Heavy Filler is a water-based and flexible leather putty used to fill small holes and scratches. Once dried, it can be sanded to achieve a smooth and even surface before coloring. Heavy Filler is white but can be tinted with a few drops of Leather Colourant.
Sandpaper is used to sand away imperfections and minor scratches on leather, as well as to smooth the surface of Heavy Filler leather putty if needed.
Feel free to watch our instructional videos for inspiration.
Basic instructions for leather repair kit:
Note: The products in this kit can be used for various types of leather repairs, so not all products may be used for each repair.
Deep crack in leather (but not a hole): Use the palette knife to apply an even layer of Heavy Filler leather putty into the crack to fill it. Scrape away any excess putty around the crack. Let it dry for 15 minutes (use a hair dryer to speed up the drying process). Use sandpaper to smooth out the filled area. Since Heavy Filler is water-based, it may shrink slightly as it dries, so repeat the process until the leather surface is smooth and you are satisfied.
Cracks/crazing on the leather surface: First, gently sand the surface with sandpaper to even it out. If the area with crazing is large, apply a few thin layers of Leather Binder, allowing each layer to dry thoroughly. If the crazing is deep, fill it with Heavy Filler leather putty. Let it dry for 15 minutes. Sand over the leather putty to achieve a smooth and soft surface. Apply a couple of layers of Leather Binder on top of the area filled with Heavy Filler. Let it dry.
Tear (hole) in leather: Ensure the edges of the tear are not frayed. Cut a suitable piece of reinforcement fabric (about 2 cm around the damage is appropriate). Mark a cross/line in the middle of the fabric with a marker. Use the palette knife (and possibly tweezers) to insert the fabric under the tear, ensuring it is in place and the marking is visible. Then apply leather glue between the reinforcement fabric and the underside of the leather using the palette knife. Ensure the entire reinforcement fabric is covered with leather glue. The glue is activated by heat, so heat it with a hair dryer for approximately 5 minutes, then allow it to cool.
Once the leather glue is dry, fill the "scar" in the tear with Heavy Filler leather putty. Let it dry for 3 hours (speed up the drying process with a hair dryer). The leather putty may shrink slightly as it dries, so refill as needed until it is level with the leather surface. Sand the surface until it is smooth.
Hole in leather: Insert and glue a reinforcement fabric in the same way as repairing a tear (above). Then fill the hole with several thin layers of Heavy Filler leather putty. Aim for about four layers of Heavy Filler to fill the hole. Allow approximately 20 minutes drying time between each layer. After the final layer of leather putty, let it dry thoroughly for an hour. Gently sand the surface with sandpaper until it is smooth. Apply a couple of layers of Leather Binder on top of the Heavy Filler leather putty.
Burn mark on leather: Cut a cross across the burn mark to release tensions caused by heat. Ensure you only cut the surface so as not to create a hole through the leather. Then cut away the burnt part of the leather, leaving a small crater. Fill the crater halfway with Heavy Filler leather putty and let it dry for 20 minutes. Fill up the remaining area of the crater with leather putty up to the edge of the crater. Let it dry for an hour and then sand it with fine sandpaper. If needed, apply another layer until it is smooth.
The leather repair kit can be combined with a Leather Dye Kit for coloring the repaired leather.


